Computer Tech 1 Lesson
Intro to Adobe Premier
This is an introduction to learning to edit your own videos in Adobe Premier. For this first project, we will start with using still pictures from the Internet. In the next project, we will use video clips.
1. Make a new folder on your desktop. Give it a name.
2. Start by saving pictures into that folder. You will need at least 25. Use Google images.
3. Start a new Adobe Premier project. Name it and save it in the same folder as your pictures.
4. Import all the pictures into your project.
5. Adjust the length of the pictures until you are satisfied with how it all plays back.
Here are video instructions to help you get started on the first project.
Intro to Adobe Premier
7. Next, we will add some animation to the pictures. Here's a short video that shows you how to do that:
Animating Pictures in Adobe Premier
8. Finally, add an audio track and put some music in the track. Once you have the audio in the sound track, you will need to adjust the levels and add a fade. Here's a short video that show you how to do that:
Working with Sound in Adobe Premier
9. Now you are ready to finish up your project. Make sure you first select the timeline. Then, Click on FILE>EXPORT>MEDIA. You will get a window that will look like this:
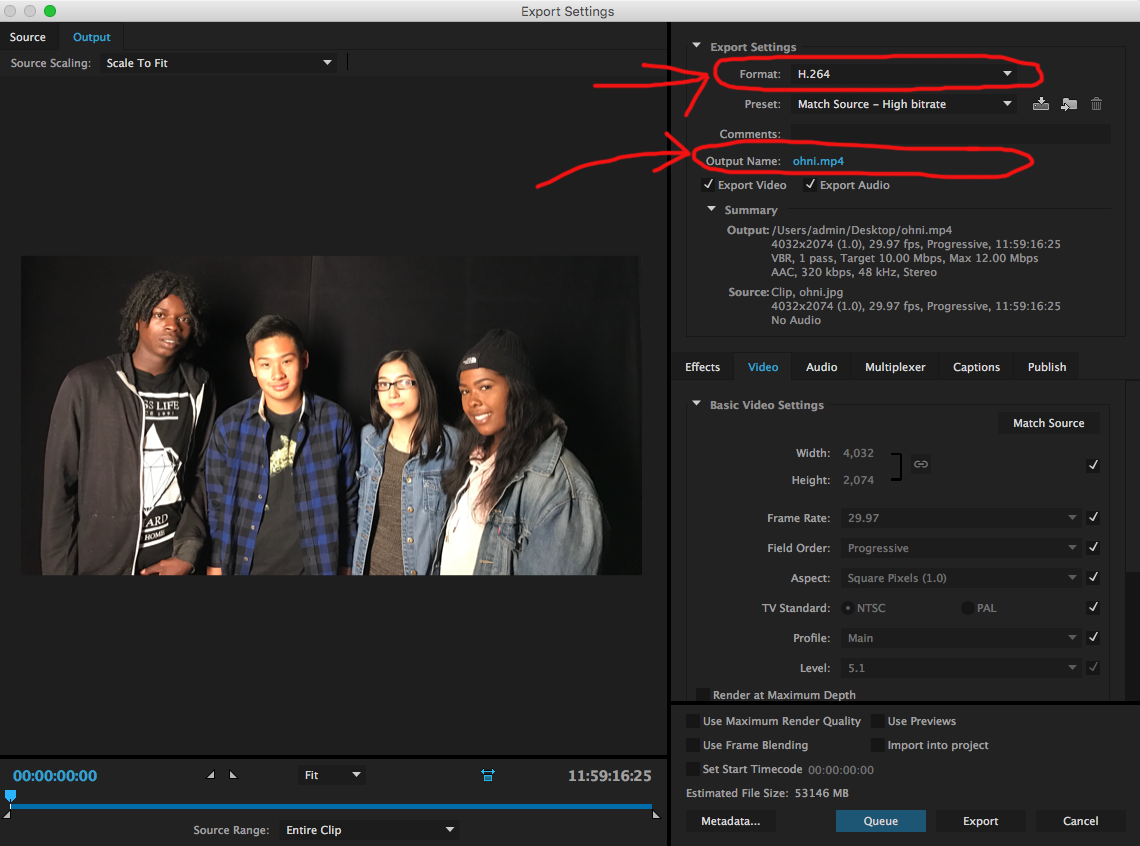
Notice the format circled in red. Change the format to H264.
Change the output name by clicking on it. Give it a name and be sure to save it on the Desktop or in a folder you know.
10. Finally, click on the export button in the bottom right corner. After it exports, upload your file to Google Classroom.